Low Light Photography

lightbulb

Low light photography can come in many different places. You could be inside, especially in a gym, and realize that there isn’t enough light to really capture the moment. At the same time, you could be outside and not be able to see anything except the sky. These are some helpful camera tips to help make your low light pictures even better.

Of course step number one is to try to get as close to a light source as you can. If you are taking a picture of a group, try having them stand under an actual light. It is the easiest way to get more light in a picture.

Try shooting in the raw. This kind of picture is easier to work with, but it will take up more space. It will make it easier to take into Photoshop or your photo editing software and fix it how you see fit. It is also easier to recover details if you over or under expose the picture. This is great when you are working with low light because you do not have to have your camera settings perfect and you can still get great details.

Set the ISO up as high as it can go. ISO is what deals with light. The higher the ISO, the faster the shutter will capture the image. If you have an ISO of 3200, the shutter speed will be 1/32 of a second. This will capture a lot of light in a quick time. Set your ISO high so you can get a quick burst and capture a lot of details. In order to do this, you will probably need to have a tripod with you. You have to hold your camera extremely still, and the best way to do this is to put your camera on a tripod. Pack one in your bag just in case you need it.

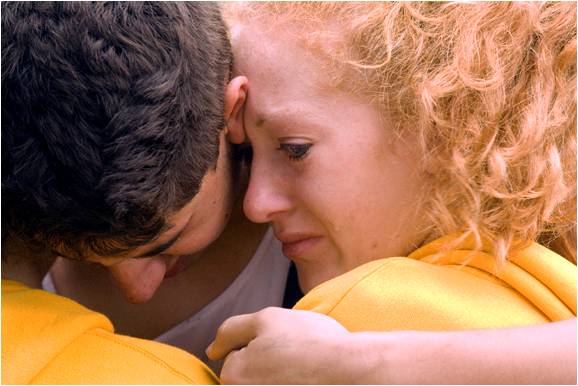
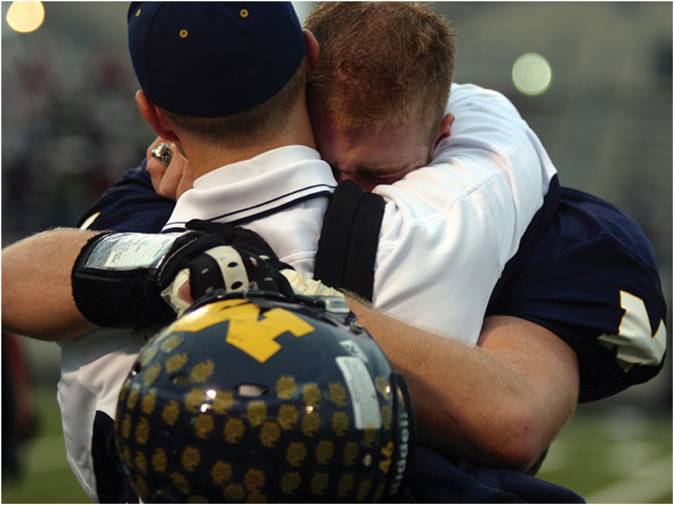
Also, low lighting places can set you up for some dramatic and interesting shots. If you can’t seem to get details of people, think about shadows you can get. A player going up for a rebound on the basketball court might be a very interesting image for a divider page. Get creative with your shots and think about how a back light might help you, rather than hinder the shot you were expecting.

These are just a few tips in order to help you shoot in low light areas. There are a lot of tips you can find in order to make your photography even better, but these are some of the main ones. Before you shoot in low light areas, make sure you have the equipment you need. Tripods, flash, and lenses are a must. Always be prepared when shooting in all kinds of conditions. It will not only make you feel better, but it will make your pictures look better.

Black and White VS. Color Photography

cVSbw

There is a major difference between black and white and color photography. Photography plays a key part in not only yearbook and journalism, but also how the world sees things. In a world of applying different filters to photographs, you should know when to use black and white and when to use color.

Color photography appears most everywhere now in the world. Regardless of where you look, you see bright and vivid color photography. There is a time and place to use this specific medium. Of course most of your books are going to use color, and that is wonderful! If you are trying to give the photo more details, color might be your best bet. Color can connect more dots for your audience. Look at the photo above on the right. This picture was taken by Steve McCury. Try to picture this image in black and white. You wouldn’t have as many details. Her red outfit stands out on the green background. They you continue to look around the image. Her eyes really pull you in and make you want to look deeper into the picture. Of course this photo might be strong in black and white, the photographer wants you to have those details. You really want to use color when there are distinct hues that you want your audience to see. Think about someone sitting in an art class, you want to get an overhead shot of someone painting with their open paint containers all around them. It will be much more pleasing if it is in color.

Black and white photography, while it may be an older form of photography, is still frequently used. This will produce a more timeless photograph. It also makes shadows stand out more. The picture on the top left, taken by Yusuf Karsh, is more dramatic in black and white than it would be in color. Try to picture the image in color. You would lose some of the emphasis on his facial lines. You may also be drawn to the color of his suit rather than the subject itself. Black and white usually adds a lot more drama and depth to a photo. Think about a Friday night football game and out of nowhere is starts raining. While it might be cool in color, the drama of the rain in the lights and the glimmer of the helmets might make this photo more pleasing to the viewer.

While most of your book will probably be in color, keep in mind the thought of black and white. It might help you boost the photography in your book to have both forms. You could use color on the spreads through the book and only use black and white on the divider pages or the intro and closing. It could make your pages stronger. When you go out and photograph or you think your photo could be better, try switching between the two. It can only help your photography.


Post by : Hannah Funderburg

The History of Photography

Untitled

Joseph Niepce captured the first photograph in 1827. He used a camera obscura to expose the film. He later came to call these heliographs. These, however, were not permanent. His photographs required eight hours of light to expose and would fade away soon after taking the light away. He went on to figure out how to preserve the photographs on light sensitive paper. This was the start of something new in the world.

By the 1860’s photography had been well developed and was about to make history again. The American Civil War broke out in the spring of 1861. America was split between the Northern and Southern states. Many homes sent men to fight in the battles but no one really knew what the battles were like. The Civil War was the first war that was extensively photographed. These images brought the pain and the conflict to the people of the country. The use of the printing press also played a key role. The photographs that were taken could now be published in newspapers and be sent across the country. The photographs brought light to the subject of war and people could now see how it was affecting the country.

Many of you are probably wondering why any of this is important to the yearbook world we live in today? Take a second to think about what our yearbooks would be without photography or even photojournalism as a subject. If we took photographs like the first one, it would be a blurry picture of the school and that’s it. The picture itself would take a while to develop and who knows if we could even tell what it was. The Civil War brought on the idea of photojournalism, or bringing foreign events home. People could now see what was going on without actually having to be there, much like events in the yearbook.

If it was not for the photojournalism during the Civil War, the world of journalism may no have been as advanced. The photographs brought the war to people’s front doors. Photojournalists today do the same thing. They show raw emotion people do not get to see everyday. It is a way for people to relate to others around the world. It can also be used to make a point. It is something people cannot ignore. It captures a moment in time that can be very powerful. It brings humans together in a way that would not have possible without the invention of cameras and their use in the Civil War.

Think about this as you capture the events of the year. Think of the moments that you are going to want to look back on. You want to capture the emotions and events that not everyone might see. Happy capturing.

Point and Shoot Cameras

Point and shoot pic

Point and shoot cameras are a wonderful tool to have for a yearbook staff. They are lightweight, cheaper than DSLRs, and don’t require as much equipment. They are easy to carry with you to many different events, and in most cases fit in your pocket. There are some key things to keep in mind though.

Make sure you know how your camera works. There are a lot of easy presets on the camera that you can use to make shooting easier. Presets usually include sports, landscape, and portraits. These presets are nice because you can quickly turn the dial, or hit the button and change the settings. They are nice when things are fast paced and you can’t manually change the settings. You can also use these settings in other ways. The landscape preset can be used if you want the background and foreground to all remain in focus, whereas the portrait mode will just keep the foreground in focus. You can use these presets in many different situations depending on the look you want for the picture.

The next thing to keep in mind is to use the rule of thirds. This is a photography term to make the shot interesting. Think of your picture divided into a 3×3 grid. Some cameras have the option to have this grid appear on the screen for easier use, too! Try to not center the people so their face, or the action, is in the middle square. The picture will be more interesting if you move the action over. You can also crop things out to make the picture more interesting. Make sure you do not crop out anything important, or body parts! Also try to use different angles to make the photo more interesting.

Try to avoid using the flash on point and shoot cameras. The flash is very close to the lens, and is also relatively weak, and will not reach very far in distance. With the flash, it causes subjects to become flat with no shadows. It also washes out the subject. This can make the photos look bad and you do not want that in your book. If you need a flash, put a piece of tissue paper over the flash. When you do this, the flash has nothing to bounce off of but it still lets some light through to lighten the picture.  After shooting your pictures, if you edit the photos in Photoshop, it will be easier to fix a picture that is underexposed compared to something that is overexposed. (Overexposure is the same as washing out a photo – having too much flash light land on the subject. Underexposure means the setting was just a little too dark and the photo is not the optimum brightness for use in the yearbook, but this CAN be fixed!)

You want to take high-resolution pictures. These pictures are sharper and look better in publications. In order to take high-resolution photos, change the setting. Just be aware that high-resolution is determined by the number of pixels. This is what improves the sharpness. The more pixels you have, the bigger the file will be though. You may need more memory cards to hold the photos but it will be worth it for better pictures.

Optical zoom is the zoom you need to have. It is a true zoom. It zooms in or out while focusing on the subject. It brings the subject closer to you. Digital zoom does not. This zoom takes a section and enlarges it, not the whole subject. In order to get the best zoom, get a camera with a high optical zoom range, and don’t base a purchase off of the digital zoom range.

Point and shoot cameras are an easy tool to have to make the book better. The pictures will look nice and it is easy to carry around. Plus it is a lot less expensive than a DSLR and can perform almost in the same ways. If your staff has limited funds available, or you just want to build up your equipment bank, point and shoot cameras are a great option! 

DSLR Photo Tips for Every Staff Member

understanding-iso-100

Every staff member needs to know the basics of photography, just in case a spur-of-the-moment shoot happens. You need to be able to pick up a DSLR and change some settings to get a good shot. Here are some tips on how to be a well-rounded photographer.

When you are shooting, think about the ISO. ISO stands for International Organization of Standardization. This may be a little confusing if you are not familiar with the camera. Basically, the ISO is the setting to determine how much light is allowed into the camera. The ISO can be thought of as the old-fashioned “film speed” from the past. The more light the environment is, the lower the ISO needs to be. Let’s look at the following comparisons for suggestions on ISO in a certain setting!

ISO 100 or 200               Outside, a fair amount of sunshine

ISO 400                              Inside candid situations

ISO 800                              Inside sporting events (gym has

updated lighting)

ISO 1600 or 3200          Inside sporting event in an old

gym, outside sporting event at night

The next step to taking better pictures is to try something different. It is boring if you take all of your pictures at eye level and of the same event. Try to mix it up a little, and try different points of view Stand on a ladder or sit on the ground get the picture. The angle of the picture can make the viewers look at events differently. Plus, if there are more interesting pictures, the spread will have a more unique appeal to the viewer. Photos grab the readers’ attention and they will want to read the body copy that accompanies those interesting images.

Always remember where you are. If you are at a big event like a pep rally or a major game, send multiple photographers. You want to capture a lot of different emotions and events that are going on and it is hard if there is just one photographer. If there are a couple of photographers, one person could be on the sideline shooting the game, while one is in the stands with the fans. You always need to be aware of where you are and what is going on around you. Try to capture the emotion and energy in the image.

Equipment is a major thing. Without the right equipment, you will not be able to capture the moment the way you want. There isn’t one particular lens a staff should absolutely purchase, but an adviser should do some research before buying equipment. Talking with Lindsey, Danielle, Jenny, or Katie is a great start for a major purchase like this! We want to make sure you purchase a good camera and lens that will provide for a wide range of uses.

As a photographer, you should try to avoid flash. Let’s say that again! PHOTOGRAPHERS SHOULD AVOID THE FLASH LIKE IT IS THE PLAGUE! Not only does it wash a lot of color out of the picture, but it is also not allowed in a lot of places—such as volleyball games. Train yourself to use the settings on the camera instead of using the flash. This is another reason why getting to know how to use ISO is so important. Flash is very distracting, creates harsh lighting situations, and in general, doesn’t produce the best image.

The main thing to keep in mind is to just shoot. Do not constantly keep looking at what you just shot. You might be distracted from something really important. Shoot now, edit later. You will be a lot happier with the results. If you are not happy with photos you have shot when you do sit down and look at them, keep in mind what didn’t work well when shooting, and then improve on your shooting technique. This will help you grow as a student photographer.

Not everyone on the staff has to be a “professional” photographer or know how to use all of the buttons on the camera. These six tips should help you though. And if all else fails, just shoot. That’s all you can do. More than likely, you will end up with pictures that you like.

Without Great Photos, Great Design is Pointless (part three)

As promised…part three. Photography is one aspect of the spread that is a non-negotiable. Having good photography, stunning photography, will draw the reader in just as much as a catchy headline will. In fact, we often tell staffers that the two elements (headlines and the dominant photo) are competing against each other to capture the viewers’ attention first.

This third part will focus on a few different concepts of composition of a photograph. The first being leading lines. Leading lines act as a guide to draw the viewers’ eye into the image and lead directly to the main subject of the composition. Let’s look at some examples from the talented student photographers at McKinney High School in Texas.

Leading lines to the subject

Leading lines to the subject

Leading lines drawing the viewer to the ideal moment -- the hand-off.

Leading lines drawing the viewer to the ideal moment — the hand-off.


The second concept is that of framing. Much like leading lines, framing a subject assists the viewer in being able to only focus on the subject matter of the photograph.  Framing also creates a composition that is more artistic in nature, and can create interest and movement when used on a spread. Please see the examples below.

Framing, using the available light, not blowing out the image

Framing, using the available light, not blowing out the image

Framing, natural framing

Framing, natural framing

Framing, filling the frame

Framing, filling the frame

Framing, filling the frame, unique angle

Framing, filling the frame, unique angle

Finally we have selective focus. This can sometimes require a photographer with a higher skill level, as the photographer must understand the aperture and how to manually focus. This effect is most easily achieved when using a DSLR. Selective focus helps to draw on the emotion of an event through the use of the focus. Please see the examples below.

Selective focus enhances the emotion felt by the loss of the game.

Selective focus enhances the emotion felt by the loss of the game.

Focusing on the hands keeps the privacy of the moment.

Focusing on the hands keeps the privacy of the moment.

Again, we would like to thank the student photographers at McKinney High School for so generously sharing their images.

Without Great Photos, Great Design is Pointless (part two)

Hello friends, and welcome to Part Two of the great photo story. That’s what we want to achieve in yearbook — telling the story. And we all know the saying — a picture is worth a thousand words. (Don’t even get me started on how I wish I could change that saying to get rid of the word “picture” and replace it with “photo!” We don’t take pictures for yearbook, we take photos for yearbook. Our student photographers are not picture-takers, they are student photographers. But I digress.) If we haven’t figured this out by now, a posed photograph is static, it doesn’t tell any kind of story; but a candid image, capturing emotion or reaction to an event — now that speaks to you.

This post will give several examples for that BIG ticket photo — the one capturing the emotion or the reaction to something. Equally important in this notion, is the concept of interaction — having at least two people, interacting, and filling the frame (we’ll come back to this in a second). There is an idea in photography to allow your subject to be isolated, which can create for some amazing photographs as the student photographers at McKinney have shown us (scroll down), but these images require a greater telling of the story. Sometimes, a photograph showing the interaction between two people — whether it is tight on their faces (really allowing the emotion to come pouring out of the image), or a wide angle shot with the background — that image can do just as much “telling” as our words can.

Let’s look at some examples:

Image

Interaction, filling the frame

Image

Interaction, filling the frame

Image

Interaction

Interaction, emotion, filling the frame

Interaction, emotion, filling the frame

Isolation

Isolation

Isolation

Reaction, wide-angle

Reaction

Another great idea, and this isn’t related to the above information in the least, is the concept of repetition. Repetition can create for an artistic photo, or it can just create general interest and movement when placed dominantly on the page spread. Usually, repetition is easily found at sporting events — think uniforms, standing in formation, standing in lines. Our first example of repetition is EASY to achieve at any sporting event where the National Anthem is played — all players’ bodies, faces, eyes are going in the same direction — place your photographer in the very front of that line, looking at them, and have the photographer take a step to one side and capture that moment.

Here are a few examples of repetition:

Repetition

Repetition

Repetition

Repetition

Repetition

Repetition

Source: McKinney High School Yearbook Student Photographers, courtesy of Lori Oglesbee, McKinney High School Yearbook Adviser, McKinney, Texas

Part three to come next week!

Without Great Photos, Great Design is Pointless (part one)

Getting photos for the yearbook seems to be an easy task – but there is more to photography than pointing the camera and pressing a button. The photos in the yearbook capture the moments of the entire year…so the pressure to get great photos is definitely high. Here are some images to share with the staff, breaking down some of the basics, and serving as examples of some more technical attributes and ideas. This will help the students to go out and get some great shots for the yearbook!

Source: McKinney High School Yearbook Student Photographers, courtesy of Lori Oglesbee, McKinney High School Yearbook Adviser, McKinney, Texas

Anticipate the Moment

anticipation 1 anticipation 3

 anticipation 2

Don’t blow out your subject — Use your Available Light

(This means NO FLASH!)

available light 1 available light 3 available light 2

Shoot from an Interesting and Unique Angle

From inside the golf cart.

From inside the golf cart.

Wide-Angled Bird's Eye View

Bird’s Eye View (with Fisheye Lens)

Worm's Eye View

Worm’s Eye View

More to come next week!

“Ah-Ha” Photography Tricks

Thinking about all the equipment that a photographer uses could definitely stress anyone out, especially when a specific look is trying to be achieved in the photos. While a million dollars would be nice to buy all of the equipment, there are ways to use the things in your home that will help to get the desired photo composition. Jim Harmer, author of the article “9 Weird Photography Tricks That  Actually Work,” gives really great tips on using household items that achieve the same function and use as professional equipment.

If I ever had an “ah-ha” moment it would be when reading this article, the tricks that Harmer wrote about are tricks that anyone can do with a camera.  These tricks consist of household items that are useful, program tricks to enhance the look of a photo, and uses for other equipment.  It’s funny that some of these tricks are such “no-brainers” but they totally slip someone’s mind when the time actually comes. The first trick that astounded me is  what to use in place of a tripod—the solution,  screw your camera on to the lampshade-holder. Who would have thought that something everyone has in their home could be used for setting up a camera! Not only are these tips really helpful for substituting equipment, but also giving tips to help enhance the quality of your Photography. For instance, how to delete tourists from travel photos—Harmer shares an easy tip for doing this!

These are great tips for the beginner photographer wanting to do a specific photo shoot, or for a photographer that needs equipment solutions and problem shooting tips that are a little “out of the box.”  Thanks to Harmer these tips are available to everyone by going to http://improvephotography.com/8806/photography-tricks/. Check out even more tips by exploring the different articles that Harmer has written!

What is a Multimedia Story?

Screen shot 2013-03-05 at 1.06.01 AM

Hey everyone, I have a surprise for you (kind of)! Today’s blog was actually not inspired by a late night pin (although there probably is a pin of this somewhere if we all took the time to look for it). This is an article I read a few weeks back that I was debating making a blog for but it will be useful to someone, so, why not, right?

Today it seems that journalists’ biggest competition is with every smart phone or computer owner who can publish their own blogs about current events and people’s attention span for reading news stories online. How do we combat this? Well, we get a little creative and publish multimedia stories as opposed to just text or photographs.

This is an example of an infographic. An infographic is simply a picture that displays information in a different way. This technique is super helpful when presenting statistics.

This is an example of an infographic. An infographic is simply a picture that displays information in a different way. This technique is super helpful when presenting statistics.

Multimedia storytelling is defined as a combination of text, still photographs, video clips, audio, graphics and interactivity presented on a Web site in a nonlinear format in which the information in each medium is complementary, not redundant. Now, let’s break this down a little more.

A nonlinear format is one in which the user chooses how to navigate through the elements of a story. Not being redundant may sound like an easy task at first because it simply means not to say what you’ve already said, but you’d be surprised at how many journalists tell the same story with photographs as they do with video, print stories, etc. One good way to make sure you’re using each medium effectively is to step back, think about your story, and picture what the message of each medium would mean. This, in essence, is storyboarding (something we’ll cover next week). The overall goal in this process is to come at the same story in multiple ways so that your audience doesn’t lose interest. (It also sets your apart from the every day blogger.)

It’s important to note that not all stories will make good multimedia stories. The best candidates for these stories would be ones that are multi-dimensional.