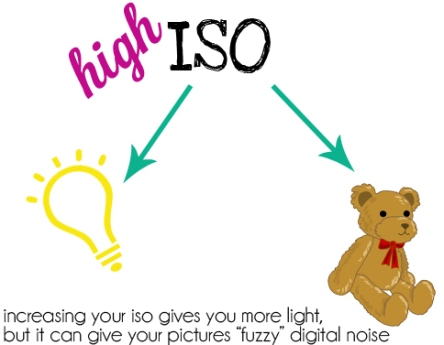
Noiseware Programs, A Continuation of ISO

If you read last week’s blog and had a mini heart attack because you thought that all of your photos were going to be fuzzy if you increase your ISO…there’s no need to stress. I would never steer you in the wrong direction, hence this week’s blog.

Suppose you do have to shoot in a dark gymnasium (my favorite analogy) and you have to increase your ISO (which would make your camera more sensitive to the light that’s available). Yes, this will make your photographs more “noisy” (aka fuzzy), but there’s a whole category of solutions. They’re called….da da da daaaa noiseware programs.

These programs are designed to work with programs, such as Photoshop, to remove the grainy texture that some photographs can acquire when shooting with a higher ISO.

For example, say you shoot the Chrysler building and it doesn’t come out just quite how you pictured. Normally, you wouldn’t use that in the publication of your wonderful yearbook. Those are the days of the past, my friend. See what a difference these programs make? (Note: the photograph below is enlarged in the program, which is causing the pixillation on the right side.)

“Well, that’s just a building that’s been zoomed in a lot,” you might be thinking. “Are these programs even applicable to what we shoot for yearbook?” Still not convinced? What about if I showed you this before and after picture of a regular firetruck that could appear in a Homecoming parade? (Note: again this photograph is slightly magnified to show the difference.)

The difference may be seemingly unnoticeable while the photograph is magnified, but rest assured, you’ll have the best pictures in the yearbook.

Well, now that the question of what these programs can really do, you’re probably wondering where on earth do you get these programs….and how much do they cost? I have good news for you, dear readers. There are free, dependable, noiseware programs.

One version of the program that our representatives use is the NoiseWare Community Edition. There are some cons to this version though. The first of those is that you’ll have to edit pictures one at a time, which is obviously time consuming. Secondly, the preset editing cannot be entirely customized (but in all actually, you might not need it to be).

However, if you feel that you’d like to customize the presets, you have other options. Instead of downloading the free version into every computer used for yearbook you might want to consider purchasing another. Imagenomic has a three-in-one program system that allows you to retouch skin, remove noise, and change the tones of your photographs to mimic film. Individually, the programs are a bit pricey, but you also have the option to buy just one (which elevates some stress). You can also bundle and save a ton of money too: it just depends on what the needs of your particular school are.

ISO is…?

I know not everyone is a shutterbug. I also know that it doesn’t take a shutterbug to realize that you can’t shoot a basketball game in a dark gym without using the flash and having obnoxiously blurry and bright photographs. So, how do you fix that? Many people might cringe when they read this, but you switch your settings to manual.

I know, I know. What a crazy thing, when almost certainly you can get it with one of the built in settings. Well, you can try, but it’d be a lot easier in the long run to switch over to manual and adjust your ISO.

Okay, so you might be on my side, but you’re also probably still wondering what the heck that is. In short, ISO (also called ASA sometimes) refers to how light sensitive your film is. Yes, I did just say film. Even though 99% of photographers these days use digital cameras, ISO is still defined as “film speed.” Helpful tip: since hardly anyone uses film anymore, this idea of the “film” in your digital camera as the LCD screen that you use to see what you’re taking a picture of.

Now, how is all of this going to help you take a better picture in a darker situation? It’s simple, once you get the hang of it (and it will take some getting used to). High ISO’s (like 6400) absorb light faster, which means that in a dark room, you won’t have to stand still with your camera for 30 seconds.The down side to high ISO’s is that because the image is being produced so fast, it (the image) will get a little fuzzy. (Fun fact: the technical term for “fuzziness” is noise or grain. The higher the ISO, the more noise there is in the photograph.)

Of course, using lower ISO’s (like 100) absorbs light slower. This means that if you’re shooting the ocean waves on a ridiculously bright day (since water reflects light), you’d probably drop down to this ISO setting. This would also mean that your photo will be really sharp with attention to detail. Below you can see the difference (the photo on the left is at an ISO of 100 while the photo on the right is at an ISO of about 1600).

I should probably add that most cameras are programmed to an ISO of 400, which is good for any normal shooting. Also, most cameras can go as far as 800 without getting a lot of noise, so there’s no need to worry if all of your yearbook pictures are going to appear blurry.

Posing Do’s

As I mentioned last week (after telling everyone what not  to do while shooting large groups), this week’s blog will be about tips and tricks that will aid you when shooting in those same situations.

  Bring a tripod. It’s that simple. In addition to that (if you are super dedicated to this hobby), you could bring a handheld remote. The advantage of the tripod allows for stabilization and a focal point for the entire group to look. The advantage of a remote allows you to be included in the pictures if you so wish.

  Have you ever wanted to get everyone in the picture, but couldn’t do so without having the camera a million miles away? Want to know how to solve that problem? Get (and use) a wide angle lens. These lenses are usually between 35mm and 24mm, but can also go smaller. In addition, because the camera won’t be so distant, you’ll be able to get more facial details (so be sure to look for nitty gritty details that need fixing!).

  Go scope out a location before you shoot in it. One of the worst things you could possibly do is not be prepared for what you’re about to undertake. Helpful tip (even mentioned in last week’s blog): be sure to pre-plan and pack any ladders or chairs that you might need for your shoot.

  A sort of sub-tip (yes, I just added that word to the dictionary…not really) of the tip above would be to make sure that your location does not distract the viewers away from the subjects. There are millions of beautiful locations to shoot at, but you wouldn’t want to have the St. Louis arch right in the middle of your family portrait. Likewise, be sure to bring any props you’d like to utilize. If you want to get creative you can choose a location that will provide a sort of context to your photo (ie. most football player shots are done on the bleachers of the stadium).

  Set your aperture to f8 or higher. Since you’re trying to get so many faces in focus, the last thing you want to do would be to have a shallow depth of field in your portrait. By selecting f8 or higher (if you’re shooting on manual), you’re telling your camera that you need a greater depth of field (ie, that you need the foreground and the background to be equally sharp).

  Take multiple shots. I guarantee that if you try to get the perfect picture in one shot you will not be successful. People blink. They also get distracted. Taking multiple shots (or shooting in continuous mode) allows you to choose from a variety of shots and swap imperfections in Photoshop.

  Have everyone wear solid colors (preferably the same color if it’s possible). If you  (for whatever reason) have no solid colors in your wardrobe, but have the color you’re going to be shooting in, it’s alright to wear it as long it doesn’t have a bold patter or huge logos that will draw attention away from your face. Doing this unifies the large group as well.

  Ever drive along the highway and get stuck behind a truck? Obviously you’re going to be in his blind spot, but it’s an unwritten rule that if you can see his mirrors, then he can see you. Same thing goes with shooting large groups. You want to make sure that you can see everyone’s face in the picture (not just their eyes though so watch out for that).

  When you’re shooting be sure to group people in subsets according to family and/or couples. You don’t want to be on one side of the photograph and have your loving parents way on the other side. This will also make it easier to identify people in the end. Helpful tip: if the event is centered around a few important people (such as a bride and groom and their wedding party), put them in the middle of the photograph.

  Don’t be afraid to shoot close ups. Just because you’re shooting a large group does not mean that all of your shots have to have tiny faces. It’s OK to break the group up into the subsets that they were divided into for earlier pictures.

Other helpful pointers for shooting large groups would be to:

  • If you are doing a standing pose, be sure to put the taller people in the back and the shorter people in the front. This makes it easier to see everyone’s faces.
  • Don’t be afraid to have the group shot be wider instead of deeper. If you have rows upon rows of faces the photograph can look monotonous.
  • To eliminate double chins, have your subjects look up slightly.
  • If you’re working with young children, or babies that can be fussy, let the adults hold them.

Posing No-No’s

First of all, let me start off this blog post by saying that this is not going to be 100% for yearbook. This post will also be for those who are interested in photography  and photo shoots. (Oh, and a little FYI, next week’s blog will be the same, but with some helpful tips on what you should do while shooting large groups.)

With that being said, please allow me to share some tips for your large group photography.

  Ever hear of shooting candids? If not, it’s when you don’t try to position your subjects a certain way. In a sense, it’s the natural form of that subject in that situation. For the most part, that’s exactly what you want when you’re photographing large groups. If you attempt to pose everyone it will take a long time and they will lose interest (and eventually become uncooperative). Helpful tip: if you want to keep interest with your subjects be sure to pre-plan what poses you’d like to shoot and communicate to the group what you want. Doing these things will make the photo shoot go by a lot faster for everyone.

  Most non-professional photographers are afraid to shoot other angles and heights besides eye level. Now, this doesn’t mean you should cock the camera to one side and take a bunch of pictures that would be added to a teenage girl’s Facebook page. This simply means that if you’re shooting a large group, do not shoot at eye level (or so that everyone is level with the horizon line). Instead, try having everyone sit on the ground or kneel. The reason for this being that if you stick to your comfort zones, viewers will get distracted. For example, look below. Now do you see what I mean?

  While photographing large groups, be sure that only one photographer is shooting at a time (if there are multiple photographers, obviously). I’m sure almost everyone has taken a group picture before homecoming or prom when the parents of your date and friends are all trying to take pictures of their young adults. The problem with this is that people don’t know which camera to focus on, which results in every set of eyes looking at something different.

  Do not forget to pay attention to the dirty details. It may seem tedious and time consuming but it will make for a better picture if you give everyone a once over before pressing that shutter release button. A few quick things to look for are tangled necklaces, awkward hand placements, dirty faces or shirts, and any stray hairs covering.

  Do not get over-technical. There is already a lot to juggle with photographing a large group and there is no need to make things more complicated than they have to be. The perfect time to get creative with photographing groups is when they are small or you have a one-on-one session.

  Do not shoot under trees or objects that will cast shadows over your subjects’ faces. The ideal light for portraiture would be fair and even light. If you do decide to shoot in directional light, have the light hit the faces of your subjects. Diffused light (light coming through the clouds or that’s bounced off a flash diffuser…although I never recommend using a flash while taking pictures) would also work if no directional light is available.